- May 12, 2020
- Laura Silva, Marketing Program Manager

With Foxit PDF Editor for Mac, you can easily access your online files, make edits, and share them with others. It’s simple to access, edit, and share cloud-based PDF files from Foxit PDF Editor Mac. Let’s start with a PDF document located on SharePoint.
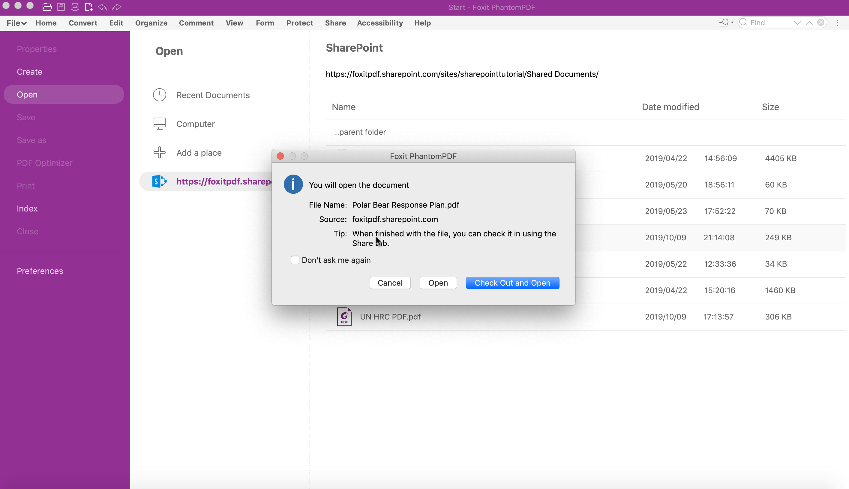
First, open Foxit PDF Editor Mac, and go to Files. Then select open and add SharePoint. Next, type in the SharePoint URL where the document is located, and click next. The window will ask you for your SharePoint log in credentials, so enter your username and password. Now that you’re connected to your account, look for the document you want to open.
Once you choose a document, a pop-up window will ask you whether you want to check out and open or just open the document. Let’s say you want check out and open your document.
In this example, we want to edit the year on the first page.

To do this, go to the edit tab and click over at a text next, click over the text and modify the year.

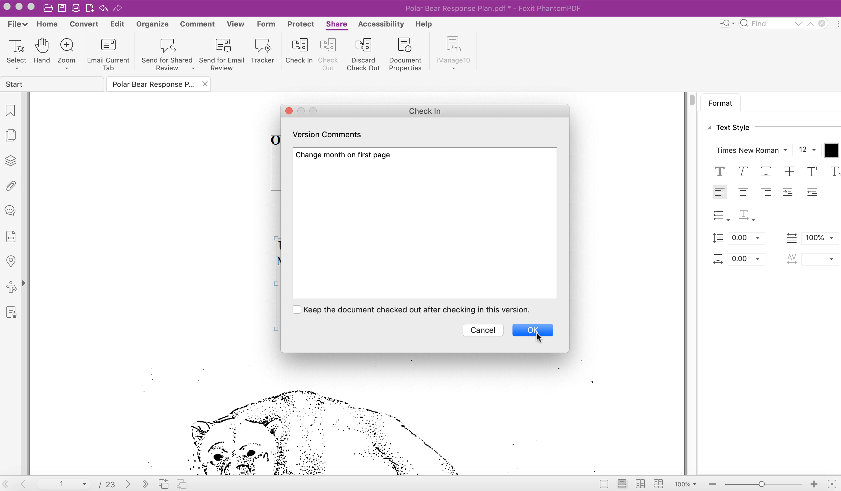
Once we finished with the edits, we go to the share tab and click over check in. A popup window will request you to add comments about the changes you just made on the document. So let’s add the comment change year on the first page.

If you want to keep the document checked out, after checking in this version, you can check the box below the comments. We’ve finished making edits to the document, so leave it blank. Finally, click okay.
Now our edited PDF document is back on SharePoint.
Now let’s save the local PDF document on SharePoint. First, open a PDF document, and then go to the files tab and select “Save As.”

Select the SharePoint folder that we just added and choose the folder where you want to save the PDF. Next, finish by clicking Save. Now our document is saved on SharePoint.
Start modifying and sharing your SharePoint based PDF documents now with Foxit PDF Editor Mac.
For more details, check out our tutorial video here.